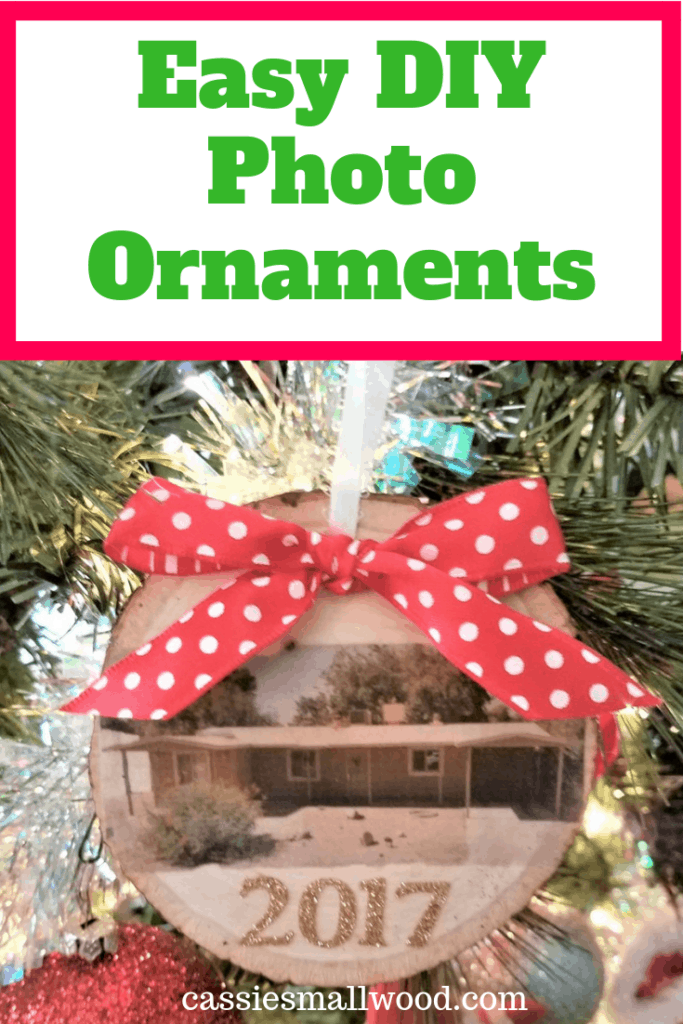
DIY Wood Photo Ornaments
 Today we’re making DIY Christmas ornaments!
 Today we’re making DIY Christmas ornaments!
These are perfect for gift giving which is the theme for this month’s DIY Blog Challenge. I’m really excited to share these wood photo ornaments with you! Be sure to see the links at the end of my post to the other awesome blogs who participated in this month’s challenge!
I love giving personalized gifts and if it’s something I can make myself, it’s even better!
My inspiration for this post is my parents are selling my childhood home after the holidays. My sister and I wanted to give them something special that they can have to remember this house that they lived in for over 30 years. We decided a wood photo Christmas ornament would be perfect. It will be a special memory on their Christmas tree each year.
Since wood slices and the rustic look are popular right now, I decided to make wood slice DIY Christmas ornaments for this project.
This post contains affiliate links. See my disclosure here.
Be sure to check out my printable ornaments too. They’re great for lots of different craft projects.
What You Need To Make Wood Photo Ornaments
- Small Wood Slices With Predrilled Holes
- Mod Podge (I used the matte one, but any will work)
- Paint brush or sponge
- Inkjet Printer
- Matte Photo Paper
- Ribbon
- Drill (If you didn’t buy pre-drilled wood slices)
- Letter and Number Stickers
- A photo you want to put on the ornament
How To Make Wood Ornaments With A Picture
How To Modge Podge Wooden Ornaments
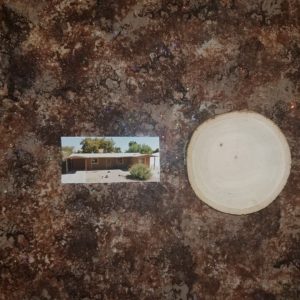
- Print your image on your paper. I used matte photo paper because the image turns out much more crisp than with regular printer paper. The image will be a mirror image on your wood slice. So if it’s important for it to not be, make sure you flip it in an editor before you print.
- Cut the image you want to transfer to the wood to fit your wood slice.
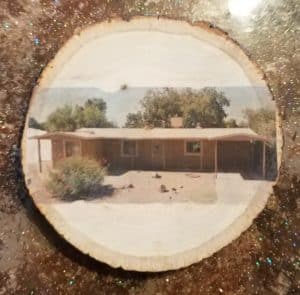
- Apply a generous layer of Mod Podge to the wood slice.
- Carefully lay your picture on the wood slice picture side down.
- Press all the bubbles out and make sure it is really smooth.
- Place something heavy on top to keep the image flat and all the air bubbles out. It’s really important to get all the bubbles out and make sure the photo is flat against the wood to avoid blank spaces. A flat picture will transfer to the wood perfectly.
- Allow to dry for about 24 hours.
- Wet the paper and begin peeling and rolling the layer of paper off with your fingers. This part is scary! I was sure my image was going to come right off and I’d be starting over. But it didn’t! Just keep adding a little water and rolling off the paper residue until your image is completely clear. If you still see white fuzzies from the paper, keep going until it’s all off!
- Once your image is transferred to the wood, all the paper is off and the wood is dry, coat it with Mod Podge. I used matte to keep the rustic look of the wood, but any Mod Podge will do the trick. This step is optional, but it will help preserve the photo for years to come.
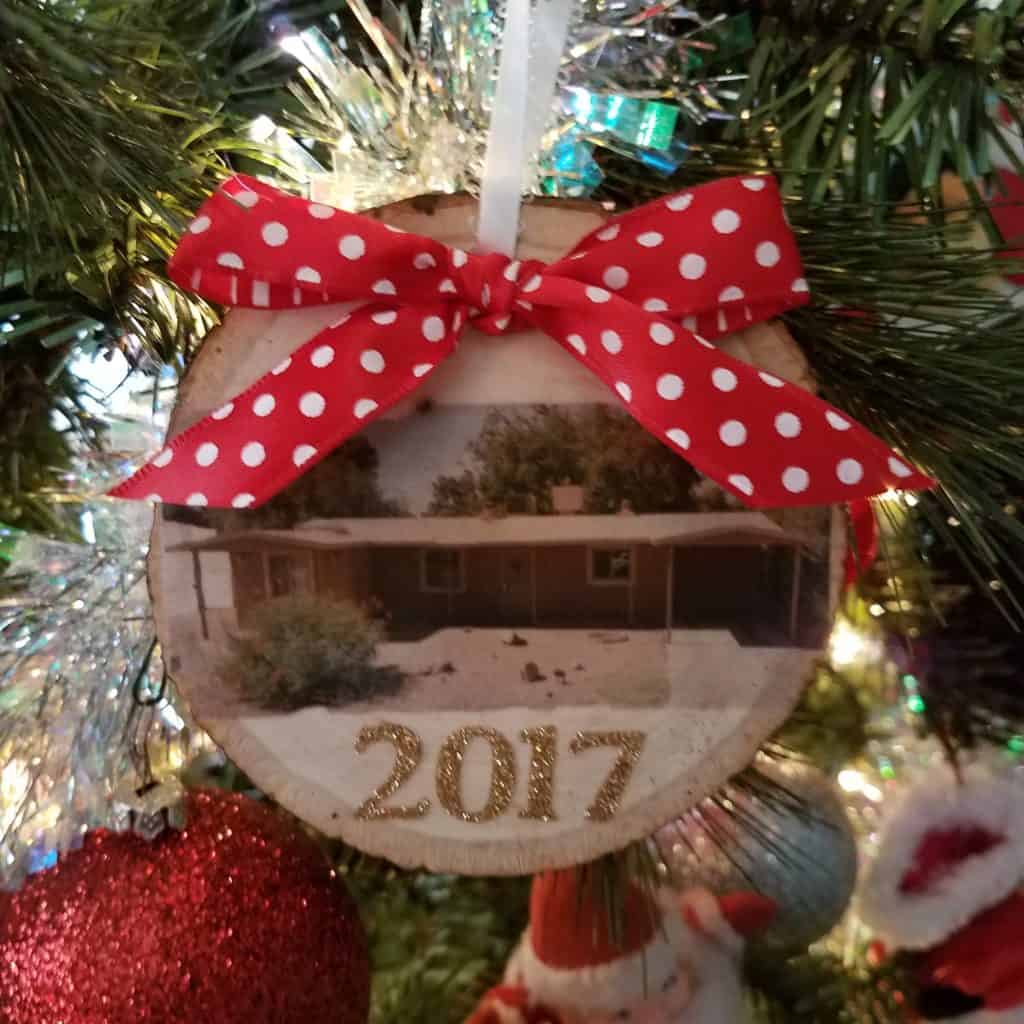
You can see at the top of the picture there was a small air bubble. The image didn’t transfer in this spot. Luckily not too obvious. Be sure to get your image flat and bubble-free! - After the Mod Podge has dried, drill a hole at the top in the center (if you didn’t buy pre-drilled wood slices) and tie a piece of ribbon through it to hang the ornament from.
- Embellish your wood photo Christmas ornaments as you wish! I added a small bow with hot glue and the cut the year in vinyl on my Cricut to add to mine.

Now you have the perfect thoughtful gift and it is so simple to do!
See what my friends made for this month’s challenge!